Securing your Cisco network often hinges on a fundamental, yet frequently misunderstood, task: generating RSA keys. This isn't just a checkbox on a configuration list; it's the bedrock of encrypted communication, enabling vital services like Secure Shell (SSH) and VPNs. If you're looking for a clear, Step-by-Step RSA Key Generation on Cisco Devices guide that cuts through the jargon, you're in the right place.
We'll walk you through the precise commands and critical considerations, ensuring your Cisco routers and switches are equipped with robust cryptographic protection.
RSA Key Generation: At a Glance
- What it is: The process of creating a pair of mathematically linked cryptographic keys—one public, one private—used for secure communication.
- Why it's essential: Enables secure protocols like SSH (for remote management), VPNs, and other encrypted services, protecting data integrity and confidentiality.
- Core Command:
crypto key generate rsain global configuration mode. - Prerequisites: Your Cisco device must have a hostname and an IP domain name configured before generating general-purpose keys.
- Key Characteristics: Generated keys are saved securely in NVRAM, not displayed in the running configuration, and are replaced if you generate new ones.
- Modulus Length: A crucial security setting, generally recommended to be 2048 bits or higher for modern security.
Why Strong RSA Keys are Non-Negotiable for Your Cisco Network
In today's interconnected world, nearly every digital interaction carries a risk. For network administrators, securing management access to critical infrastructure like Cisco routers and switches is paramount. This is precisely where RSA (Rivest–Shamir–Adleman) keys step in, forming the cryptographic backbone for secure communication channels.
RSA isn't just an acronym; it's an asymmetric encryption algorithm that relies on a pair of keys: a public key and a private key. What one key encrypts, only its counterpart can decrypt. On your Cisco device, these keys are fundamental for services like:
- Secure Shell (SSH): Replacing insecure Telnet for remote access, SSH encrypts your login credentials and management sessions, preventing eavesdropping and unauthorized control.
- Virtual Private Networks (VPNs): Building secure tunnels across untrusted networks, VPNs rely on RSA keys for authenticating endpoints and establishing encrypted communication.
- Secure Copy Protocol (SCP) and Secure File Transfer Protocol (SFTP): Securely transferring files to and from your device.
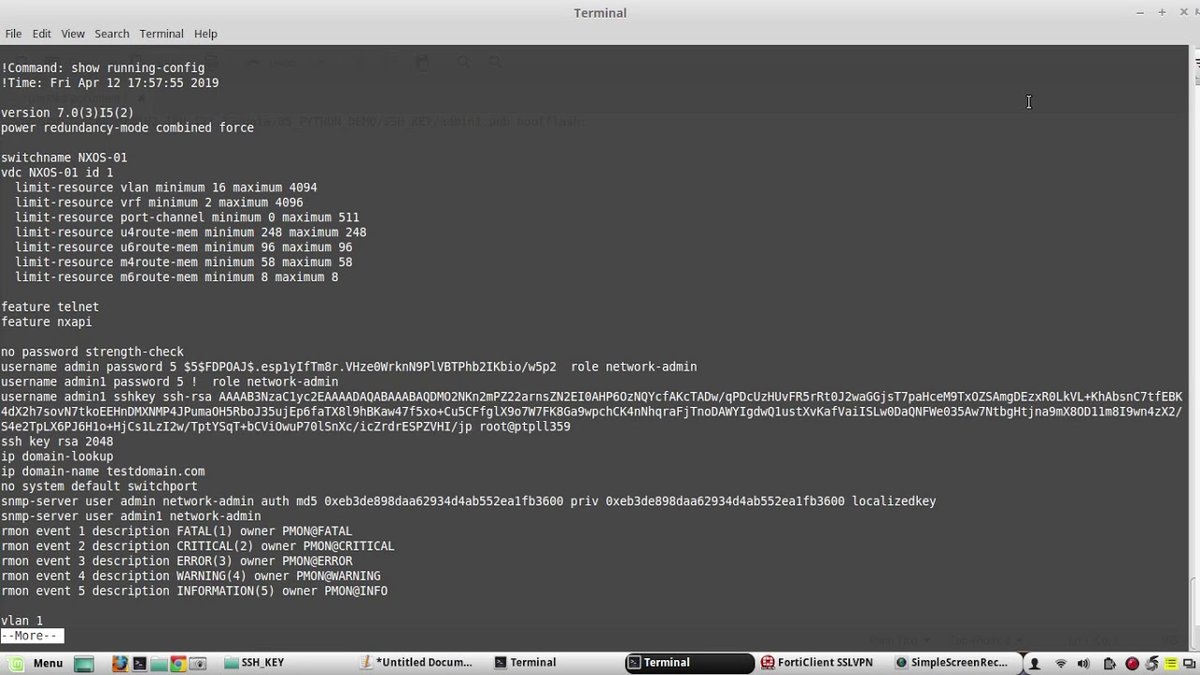
Without properly generated RSA keys, your Cisco device is essentially operating with its front door ajar. All management traffic would be sent in plain text, ripe for interception by anyone with network access. Cisco devices automatically save these crucial keys in a private configuration within NVRAM (Non-Volatile Random-Access Memory), ensuring persistence across reboots without being exposed in the standardshow running-configoutput. This hidden storage is a vital security feature, as it prevents the private key from being easily accessed or backed up to an insecure location, thereby protecting the network's secrets. For more on how NVRAM secures critical configurations, you might find how NVRAM works on Cisco devices illuminating.
Setting the Stage: The Essential Pre-Configuration Steps
Before you can even think about generating RSA keys, your Cisco device needs a basic identity. This isn't merely good practice; it's a mandatory prerequisite for generating general-purpose RSA keys, especially if you want your keys to be named using the device's Fully Qualified Domain Name (FQDN). Without these two simple commands, your key generation attempt will halt before it even begins.
1. Assigning a Hostname
The hostname gives your device a unique, human-readable name within your network. It's the first part of your device's identity.
text
router> enable
router# configure terminal
router(config)# hostname MyCiscoRouter
MyCiscoRouter(config)#
In this example, MyCiscoRouter becomes the device's local identifier.
2. Defining an IP Domain Name
The IP domain name combines with the hostname to create the device's Fully Qualified Domain Name (FQDN), such as MyCiscoRouter.example.com. This FQDN is crucial because, by default, Cisco uses it as the label for the RSA key pair.
text
MyCiscoRouter(config)# ip domain-name example.com
MyCiscoRouter(config)#
Now, your device has a complete identity, MyCiscoRouter.example.com. This FQDN plays a significant role in key identification, particularly when keys are exported or managed across multiple devices. While it is possible to generate named key pairs without an FQDN, general-purpose keys implicitly rely on this setup for their default identification. Skipping these initial steps will often result in the router prompting you to configure them or refusing to complete the crypto key generate rsa command.
Dissecting the crypto key generate rsa Command: Your Toolkit for Key Creation
The heart of RSA key generation on Cisco devices lies in a single, powerful command: crypto key generate rsa. While seemingly straightforward, it comes with several crucial parameters that allow you to tailor the key generation process to your specific security requirements.
Let's break down its full syntax:
text
router(config)# crypto key generate rsa {general-keys | usage-keys} [label key-label] [exportable] [modulus modulus-size] [storage device:]
Understanding each component is key to generating the right keys for the right purpose.
crypto key generate rsa: This is the fundamental command. Executing it without any parameters will typically initiate an interactive prompt, guiding you through the choices.{general-keys | usage-keys}: This mutually exclusive option defines the type of RSA key pair you want to generate.general-keys: This is the default and most common choice. It generates a single RSA key pair suitable for both encryption and digital signatures. For most SSH and basic VPN applications, a general-purpose key is perfectly adequate.usage-keys: This option generates two distinct RSA key pairs: one specifically for encryption and another solely for digital signatures. This provides a more granular approach to cryptographic operations, potentially offering enhanced security in scenarios where strict separation of duties for encryption and signing is required. However, it's less common for typical router management.label key-label: (Optional) By default, Cisco uses the device's FQDN (e.g.,MyCiscoRouter.example.com) as the label for the RSA key pair. However, you can use this parameter to assign a custom, more descriptive name to your key pair.- Example:
label MySSHKey2024 - Why use it?: Custom labels become very helpful when managing multiple key pairs on a single device or when you plan on exporting and importing Cisco keys between devices. It makes identification much easier than relying solely on the FQDN.
exportable: (Optional) This critical parameter specifies whether the RSA private key can be exported from the device. By default, private keys are not exportable for security reasons.- Why use it?: If you need to back up your keys or migrate them to another Cisco device (e.g., in a high-availability setup or device replacement), you'll need to specify
exportable. - Security Warning: Marking a private key as exportable introduces a security risk. If an attacker gains access to your device and can export the key, they could potentially compromise all systems that rely on that key for authentication or encryption. Use this option with extreme caution and ensure robust security measures are in place for the exported key.
modulus modulus-size: (Optional) This is one of the most significant security settings. It determines the bit length of the RSA key modulus, directly impacting the key's strength.- Range: Cisco IOS supports modulus sizes from 350 to 4096 bits. Historically, 1024 bits was common, but security standards have evolved.
- Recommendations:
- Less than 512 bits is generally considered insecure and may not function properly with some protocols like IKE.
- 2048 bits is the widely accepted minimum recommendation for robust security in modern deployments. It offers a good balance between security and performance.
- 4096 bits provides an even stronger level of security, though it will take longer to generate and may incur a slight performance overhead on older or less powerful devices.
- Interactive Prompt: If you omit this parameter, the router will prompt you to enter a modulus size, often suggesting a default (e.g., 512 or 1024) but allowing you to specify a higher value. Always opt for 2048 or 4096.
storage device:: (Optional) This parameter allows you to specify a non-default location for storing the keys. By default, RSA keys are securely stored in NVRAM.- Example:
storage usb0:(for devices with USB storage). - Note: Keys created on a USB token typically have a maximum size of 2048 bits. For most standard deployments, leaving this parameter out and relying on NVRAM storage is perfectly acceptable and secure.
By mastering these parameters, you gain fine-grained control over the security posture of your Cisco network's cryptographic keys.
Your Step-by-Step Guide to RSA Key Generation on Cisco Devices
With the prerequisites met and the command syntax understood, let's walk through the actual process of generating RSA keys on your Cisco device. We'll aim for a strong, general-purpose key suitable for most secure management needs.
Step 1: Establish Initial Access to Your Cisco Device
You'll need administrative access to your router or switch. This typically means connecting via:
- Console Cable: Directly connected to the device's console port (recommended for initial setup or if network access is unavailable).
- Existing SSH/Telnet Session: If your device already has some form of remote access, but you're upgrading security.
text
Router>
Step 2: Elevate to Privileged EXEC Mode and Global Configuration Mode
Once connected, you'll need to enter privileged EXEC mode, then global configuration mode to make changes.
text
Router> enable
Router# configure terminal
Enter configuration commands, one per line. End with CNTL/Z.
Router(config)#
Step 3: Verify or Configure Hostname (If Not Already Set)
As discussed, a hostname is crucial. If you haven't set one, or aren't sure, configure it now. Replace MyCiscoRouter with your desired device name.
text
Router(config)# hostname MyCiscoRouter
MyCiscoRouter(config)#
Step 4: Verify or Configure IP Domain Name (If Not Already Set)
Next, define your IP domain name. This, combined with the hostname, forms the FQDN for your keys. Replace example.com with your network's domain.
text
MyCiscoRouter(config)# ip domain-name example.com
MyCiscoRouter(config)#
Step 5: Generate the RSA Keys
Now for the main event. Enter the crypto key generate rsa command. We'll walk through the interactive prompts, prioritizing security.
text
MyCiscoRouter(config)# crypto key generate rsa
The router will typically present you with a series of questions:
- Key Replacement Warning (if keys already exist):
text
The RSA keypair will be generated for the host. Replace existing keys? [yes/no]:
- If you're regenerating keys (e.g., for security rotation or to increase modulus size), type
yes. - If you're unsure or this is a new setup, it's safer to type
yesto ensure a fresh, strong key.
- Modulus Size Prompt:
text
How many bits in the modulus [512]:
- Crucial Choice: The prompt often defaults to a low number like
512. Do NOT accept this default. - Recommended Action: Enter
2048or4096. For most production environments,2048is the minimum recommended. For maximum future-proofing,4096is excellent. - Let's choose 2048 for this example:
text
How many bits in the modulus [512]: 2048
- Key Generation Process:
The router will then begin generating the keys. This process can take a few seconds to several minutes, especially for larger modulus sizes (e.g., 4096 bits) on older hardware. You might see a series of asterisks or dots indicating progress.
text
% Generating 2048 bit RSA keys, keys will be non-exportable...
[OK] (elapsed time was 12 seconds)
Once complete, you'll be returned to the global configuration prompt. The[OK]message confirms success. Notice the "keys will be non-exportable" – this is the default and most secure setting. If you needed exportable keys, you would have added theexportablekeyword to the command (e.g.,crypto key generate rsa exportable modulus 2048).
Example Command Line Interaction Summary:
text
Router> enable
Router# configure terminal
Router(config)# hostname MyCiscoRouter
MyCiscoRouter(config)# ip domain-name example.com
MyCiscoRouter(config)# crypto key generate rsa
The RSA keypair will be generated for the host. Replace existing keys? [yes/no]: yes
How many bits in the modulus [512]: 2048
% Generating 2048 bit RSA keys, keys will be non-exportable...
[OK] (elapsed time was 12 seconds)
MyCiscoRouter(config)# exit
MyCiscoRouter# write memory
Building configuration...
[OK]
MyCiscoRouter#
Important Notes During Generation:
- SSH and Additional Keys: If your router had no existing RSA keys, SSH may generate an additional key pair specifically for its server function. This key will typically be named
{router_FQDN}.server(e.g.,MyCiscoRouter.example.com.server). This is normal behavior and ensures SSH can function securely. - Key Storage, Not Configuration: Remember, the
crypto key generate rsacommand itself is not saved in the running configuration. However, the RSA keys it generates are saved securely in the private configuration area of NVRAM. This means you don't need to manuallywrite memoryto save the keys, but saving your hostname and IP domain name changes is still good practice.
With these steps complete, your Cisco device now possesses a strong, cryptographically secure foundation for encrypted communications.
Beyond the Basics: Advanced Considerations & Best Practices
Generating RSA keys is just the first step. To maintain a truly secure network, you need to understand the nuances and incorporate best practices into your routine.
Choosing Your Modulus Length Wisely
We touched on this during the step-by-step guide, but it bears repeating: the modulus length is paramount. While Cisco supports a range from 350 to 4096 bits, the real-world recommendations are far narrower.
- Avoid anything below 2048 bits. Keys shorter than 2048 bits are increasingly vulnerable to brute-force attacks, especially as computational power grows.
- 2048 bits: This is the current industry standard minimum for strong security. It provides a good balance between cryptographic strength and device performance.
- 4096 bits: For environments with heightened security requirements or concerns about future cryptographic advancements, 4096-bit keys offer superior protection. Be aware that these keys take longer to generate and might introduce a marginal performance impact on CPU-intensive cryptographic operations, particularly on older or resource-constrained devices.
The decision on modulus length shouldn't be taken lightly; it directly impacts how resilient your network is to compromise. For a deeper dive into this critical choice, consider exploring the importance of choosing the right RSA modulus length.
General-Purpose vs. Special-Usage Keys: When to Deviate
For most standard router management tasks like SSH access, a general-keys pair is perfectly sufficient. It simplifies key management by providing a single pair for both encryption and signing.
However, usage-keys — which generates separate encryption and signature key pairs — might be considered in highly specialized, compliance-driven environments. For example, some cryptographic policies mandate distinct keys for different functions to limit the impact if one key type is compromised. Unless you have a specific architectural requirement or compliance mandate pushing you towards usage-keys, stick with general-keys for simplicity and broad compatibility.
RSA Key Management and Security Hygiene
Generating keys is a one-time process, but managing them is ongoing.
- Regular Regeneration: Just like passwords, RSA keys should ideally be rotated periodically (e.g., annually) as part of your security hygiene. This limits the window of exposure if a key were to be compromised without your knowledge.
- Never Share Private Keys: The private key must never leave the device it belongs to, unless explicitly being exported in a highly secure manner (and then only temporarily for a specific, authorized purpose). If a private key is compromised, the security of all communications relying on its public counterpart is shattered.
- Backup Procedures for Exportable Keys: If you generated an
exportablekey, ensure any backups are stored with the utmost security, ideally encrypted and in an offline location. Remember, the default setting is non-exportable for a reason. If you're exploring options for exporting and importing Cisco keys, treat that private key material like gold. - Integration with SSH: Generating RSA keys is often the first step in a broader SSH configuration. Once keys are in place, you'll configure your VTY lines for SSH access, set authentication methods, and define local users. Understanding best practices for Cisco SSH configuration will ensure your remote access is truly secure.
- Understanding Cisco's Approach to Key Generation: It's helpful to understand the underlying cryptographic processes. For a deeper look into the mechanisms, our comprehensive guide on How Cisco generates RSA keys provides valuable insights into the architecture.
Troubleshooting Common Issues
Even seasoned administrators can encounter snags. Here are a few common pitfalls and how to address them:
- "Error: The system has no RSA keys" or "Incomplete command": This almost always means you've forgotten to configure the
hostnameandip domain-namecommands. Go back and ensure they are set. If you're generating a named key (crypto key generate rsa label MyKey), these prerequisites aren't strictly required for that specific command, but they are for general-purpose keys using the device's FQDN. - Key generation takes an extremely long time: This usually happens when generating very large modulus keys (e.g., 4096 bits) on older, less powerful hardware. Be patient, it will eventually complete. If it's stuck, check the CPU utilization and consider if the modulus size is appropriate for your device's capabilities.
- "No RSA keypair defined" when trying to configure SSH: While you've generated keys, you might need to specify them for SSH if you have multiple key pairs or are using
usage-keys. For standard setups, simply enabling SSH (ip ssh version 2andline vty 0 4thentransport input ssh) should pick up the general-purpose key automatically. - How to verify keys: Use the command
show crypto key mypubkey rsa. This will display information about your generated RSA public keys, including their modulus size and label, confirming their presence.
text
MyCiscoRouter# show crypto key mypubkey rsa
% Key pair was generated at: 15:30:00 UTC Jan 1 2024
Key name: MyCiscoRouter.example.com
Usage: General Purpose Key
Modulus Size: 2048 (2048 bits)
Key Data:
30820122 300D0609 2A864886 F70D0101 01050003 82010F00 3082010A 02820101
00CA8BB3 6ECB1705 9811C6B7 B3DB1D2B E62C7F72 179D1F4F 89A066E0 F03E99E1
... (truncated for brevity)
By being proactive about these considerations, you're not just enabling secure services, but actively hardening your network's overall security posture. For a broader understanding of how this fits into network defenses, consult guides on advanced Cisco security hardening.
Frequently Asked Questions (FAQs) About RSA Key Generation
We've covered a lot of ground, but some questions pop up repeatedly. Here are crisp answers to clarify common points:
Do I need to save the configuration after generating RSA keys?
No, not specifically for the keys themselves. RSA keys are automatically saved in a private, secure area of NVRAM and are persistent across reboots. However, any other configuration changes you made (like setting the hostname or IP domain name) do need to be saved using write memory or copy running-config startup-config.
What happens if I generate new RSA keys when I already have existing ones?
The router will warn you and ask if you want to replace the existing keys. If you proceed by typing yes, the old keys will be overwritten and permanently lost, replaced by the newly generated ones. This is common practice for key rotation.
Can I generate a named RSA key pair without configuring a hostname and IP domain name?
Yes, you can. If you use the label parameter (e.g., crypto key generate rsa label MySpecificKey modulus 2048), the device will create a key pair with that specific name, and it won't rely on the FQDN for the key label. However, for general-purpose keys that default to the FQDN for naming, the hostname and domain name are essential.
What is the optimal modulus size for RSA keys on Cisco devices?
For new deployments and robust security, 2048 bits is the recommended minimum. For environments requiring even higher security or preparing for future cryptographic challenges, 4096 bits is an excellent choice, though it may have a minor impact on generation time and performance on older devices. Avoid anything below 2048 bits in production.
How can I check if RSA keys have been successfully generated?
Use the command show crypto key mypubkey rsa in privileged EXEC mode. This command will list details about your public RSA key pairs, including their name, usage, modulus size, and creation date.
Securing Your Network's Future with Strong RSA Keys
Generating RSA keys on your Cisco devices isn't just a technical requirement; it's a foundational act of cybersecurity. By following these step-by-step instructions, configuring the necessary prerequisites, and understanding the implications of each parameter, you empower your network with a robust defense against unauthorized access and data breaches.
Remember, the strength of your network security is only as strong as its weakest link. Regular review of your cryptographic configurations, adherence to best practices, and a commitment to using strong key lengths will ensure your Cisco infrastructure remains a trustworthy and impenetrable bastion against evolving threats. Equip your devices with strong RSA keys today, and secure your network's tomorrow.